
A boat box seat is a simple task to complete. Many seat boxes or bench boxes are fashioned according to the boat’s type and size. A portable seat box can be placed anywhere. The following steps can be generally applied to building any seat box. The following list is a template for a mobile boat seat box.
How To Build A Boat Seat Box
Preparation is the first step of building your boat seat box. Envision what you want your final product to look like, keep this in mind throughout your project.
Measure the space on your vessel to determine the dimensions of your seat box. A portable seat box need only be as large as your seat.
After your measurements, you need to collect the materials necessary to complete your project.
Building a boat seat box on a reduced budget is possible, and it won’t diminish the value of your boat seat box. Be wise when acquiring materials.
Once you have the measurements and materials, there are a series of easy steps to follow.
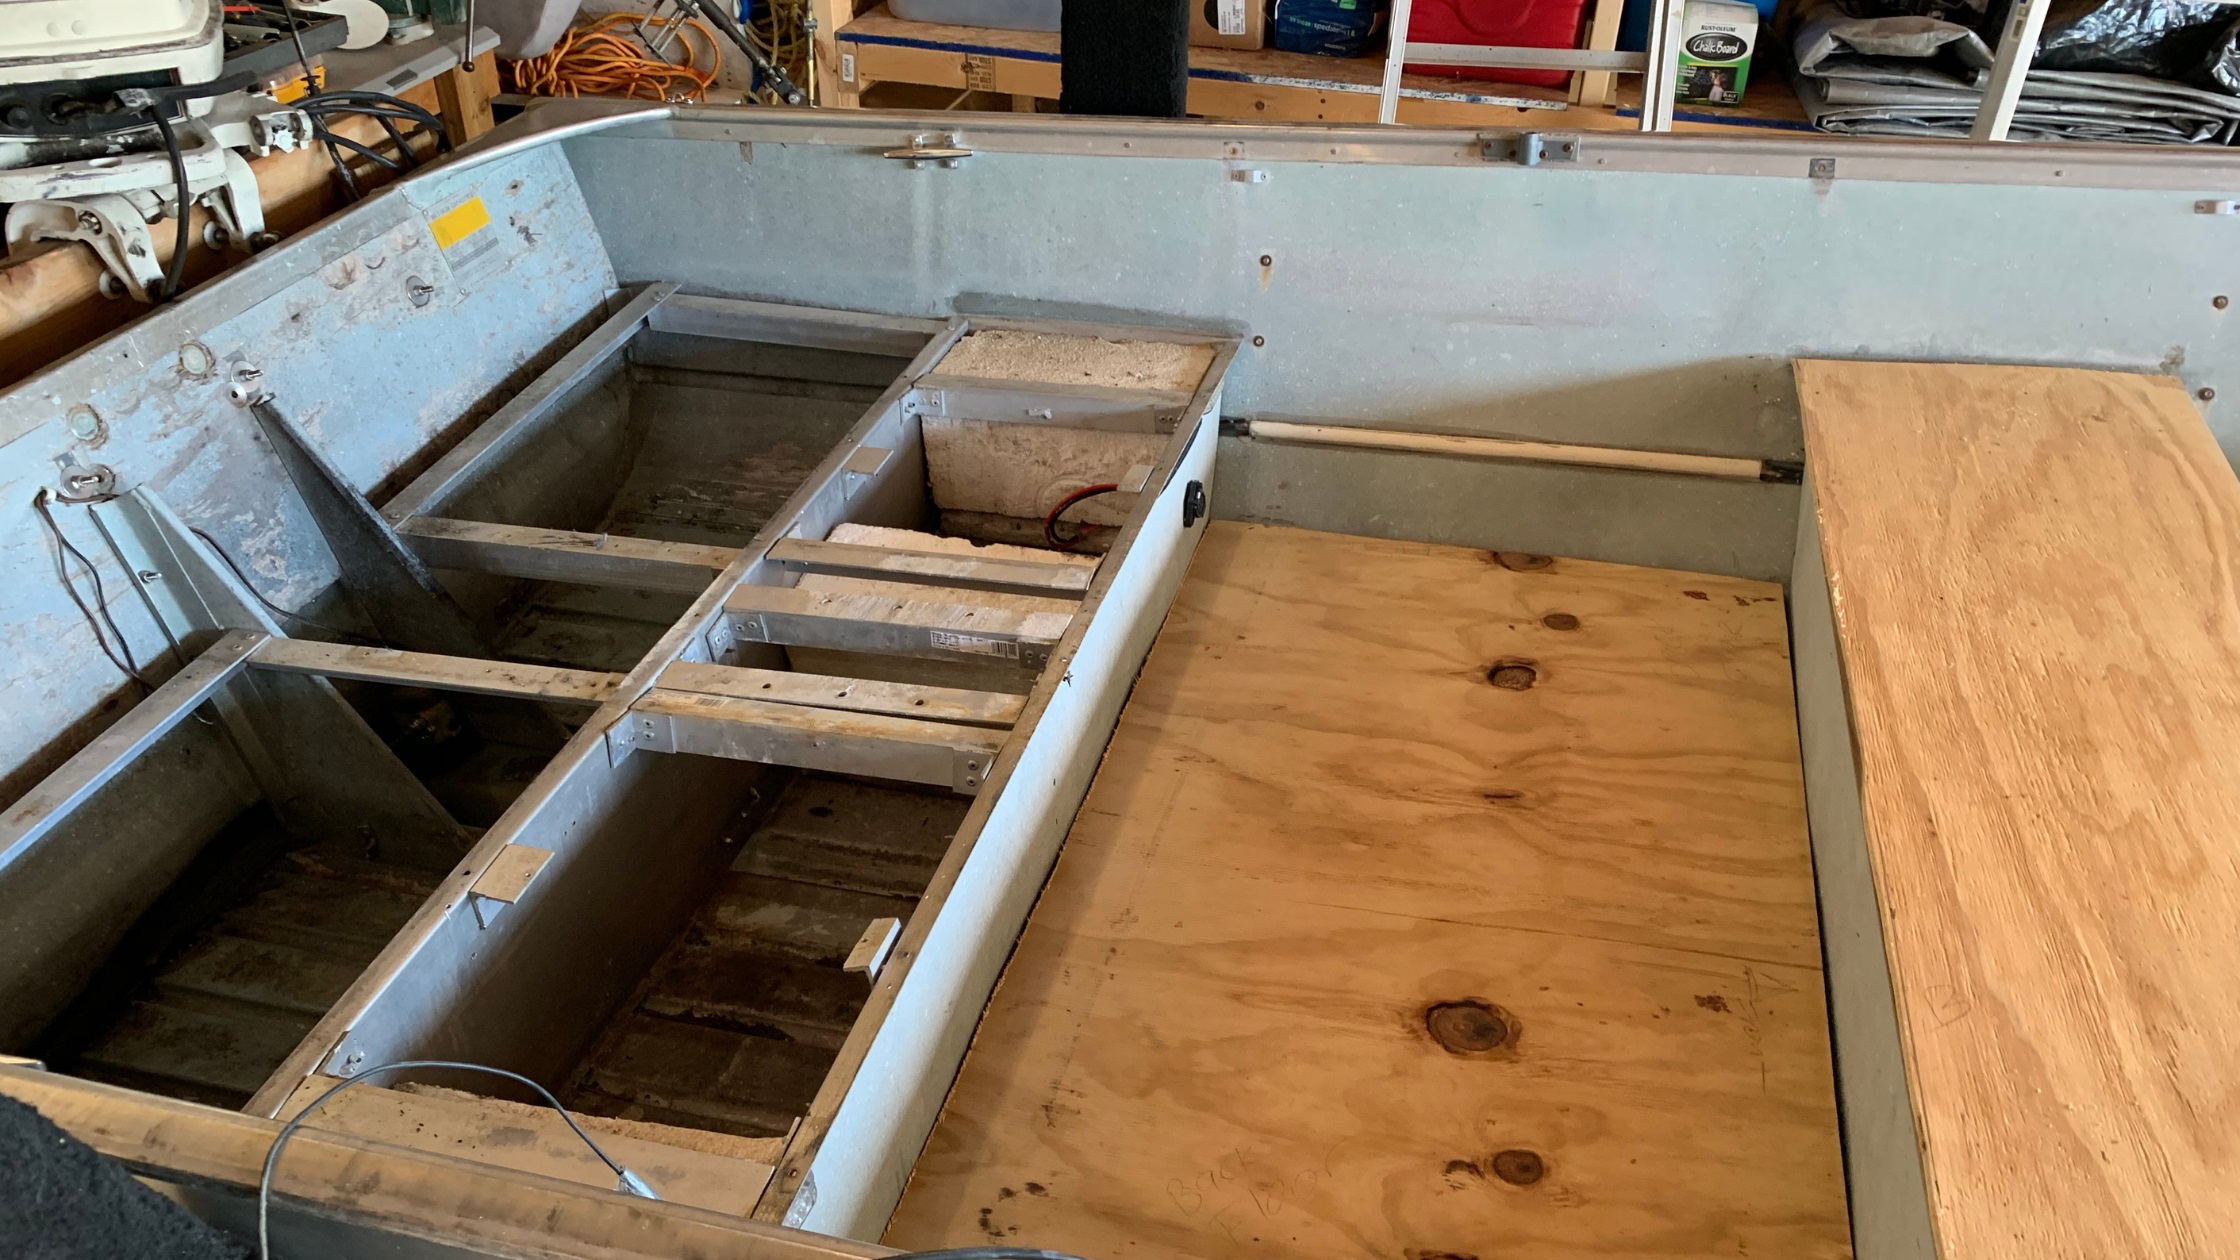
1. Preparation and Measuring for Your Boat Seat Box
Decide on the right proportion of your seat box and how it fits the top deck of your boat. A portable seat box can be small enough for your seat, making transportation effortless.
If you want to build a custom seat from scratch, make cushions or acquire an affordable fold-out seat, both are easy to fix to your box.
A local hardware store or Home Depot can assist in cutting your choice of wood to fit the right measured proportions of your boat and desired seat box.
Collecting Materials for Your Boat Seat Box
You’ll need a painting brush, gloves, mask, and apron. You’ll also need Titebond III glue, a wood primer like Timberseal, and Caulk.
For construction and framing of the box, you’ll need hinges, fasteners, an electric drill, clamps, and a tape measure.
The recommended types of wood are primarily light woods, for example, Ash, Cedar, Teak, Jatoba, Mahogany. White Oak is an excellent choice for framing seats.
Choose one of the woods for your seat box. Cedar plywood is affordable, supply and suited for the outdoors.
An excellent idea for a boat seat box is to build it in cedar plywood and layer fiberglass; this building technique will be explored below.
There are many varied natural and synthetic materials that one can choose to build their boat seat box. Choose according to price, maintenance, durability, and flexibility of the material.
There is also Vycom plastic, King Starboard, and Coosa board for efficient and straightforward construction of the base of your seat box.
Synthetic Materials for Your Boat Seat Box
If you desire synthetic and affordable material, there are different options: Vycom plastics, starboard, fiberglass, or Coosa board.
Vycom plastic is an innovative brand in plastic sheets ideal for outdoor craft and DIY projects. The base box of your boat seat will be durable, lightweight, and easy to clean.
Vycom is available in various colors and matte. Therefore, your boat box seat will look professional and blend with the rest of your boating equipment.
Fiberglass is an excellent synthetic material as its durable, waterproof, and fire-resistant. However, fiberglass can be expensive.
Coosa boards are built with high-density foam infused with fiberglass sheets. Coosa boards drill holes, hold screws, and works with resin and catalysts like fiberglass.
Coosa boards are 30-40% lighter than plywood, and it has a water absorption rate of 1%. It is a great product; however, it needs finishing.
The Tools Needed for Your Boat Seat Box
The tools you need to acquire are the correct fasteners, rivets, screws and bolts, electric drill, adhesive, clamps, hammer, pencil, pinchless hinges, and a tape measure. You can also use joineries or metal brackets.
To fiberglass the base box of a wooden boat seat, be sure to have plenty for layering. You’ll need Caulk, a type of liquid paste that fills the gaps.
Resin and catalyst are liquids that seal the fiberglass and set it once the substance dries. A resin will not work without a catalyst, and it must be mixed thoroughly, or it will not cure. Please be mindful and take caution as catalysts can be harmful.
When mixing, protect your hands, and wear chemical-resistant gloves as the resin catalyst mixture gets hot enough to burn. If you mix too much, a phenomenon occurs called kicking.
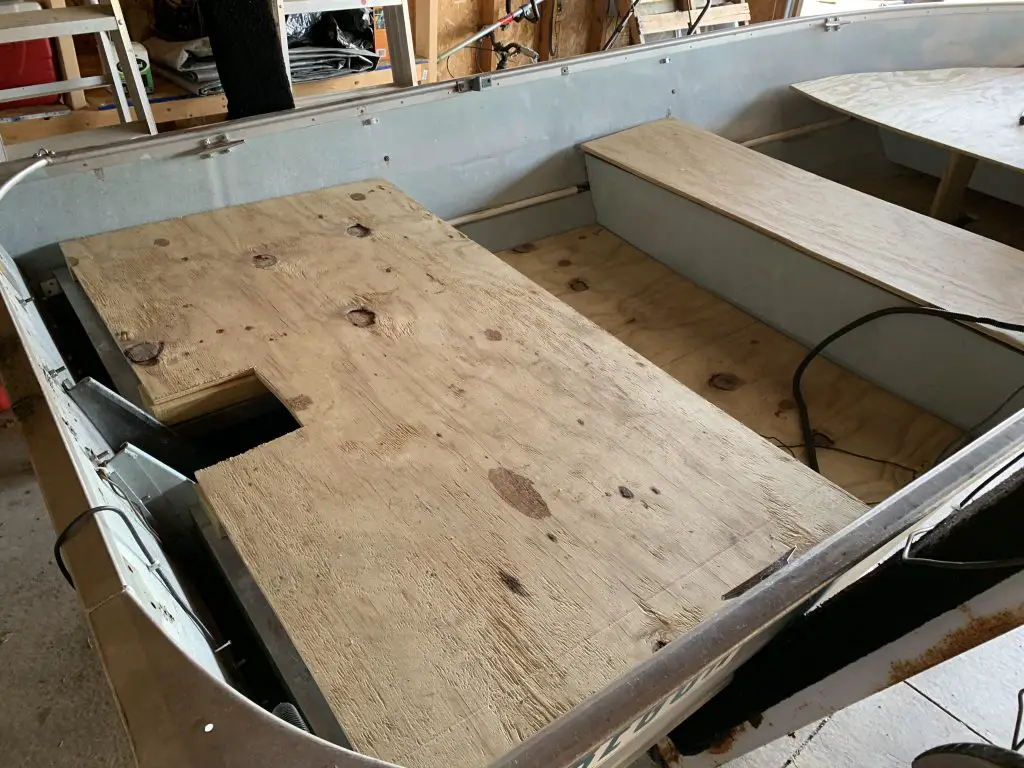
2. Framing the Box
Once you have your desired materials and tools, you can frame the base of your seat box. When cutting wood, remember to go along the grain.
Almost everything you build comes from the knowledge of how to build a box. All other construction feats arise from basic box construction.
Set the dimensions of your design with the baseboard. You should give the base space about an inch off the floor. Mark the equal length exact to all four sides with a pencil.
Then neatly shave off a small amount of the edges of your board. You can now glue the sides of the panels with Titebond III. Glue the panels at the markings, allowing the base an inch from the floor.
It’s important not to apply too much glue. The amount will not increase the glue strength. Instead, it will only make a mess. Endeavor not to get glue on the board frames.
When edge joining boards, you must not clamp them too tightly. Clamp them gently to ensure they don’t buckle.
As the boards are clamped, check their edges to see if they are warping/bending- due to too tight clamping. A good technique is to use pre-taped wood (as it won’t stick to the glue), otherwise referred to as cauls as counterweights, to correct glue-up.
Use a hammer and nails or screws and drilling to secure further joining the panels. Alternatively, you can use metal brackets and joineries to join the pieces of your box.
Use the relevant hinge or hinges for the box lid. Tightly drill screws to secure the hinge. Ensure all of the screws are fastened as the cover has much weight. Use a router to round the edges.
3. Fastening and Securing the Seat Box
Before drilling holes to attach the seat to your base box, estimate the weight your fasteners will have to endure.
Metal fasteners hold well against sheer force. The holding strength of the fasteners is dependent on the thread (for a threaded fastener or screw nut and bolt) or the heads of the rivet. All the items of your project must be secured with the proper fasteners.
Wood screws are solely for wood and are not used with fiberglass. Fiberglass or other synthetic materials like starboard can mechanically fasten or weld boards together for the box frame. Urethane glue also works, but the fastenings guarantee robust strength.
Pre-drilled screw holes must be made before assembling the seat. Attaching wood and fiberglass, you need first to make pilot holes.
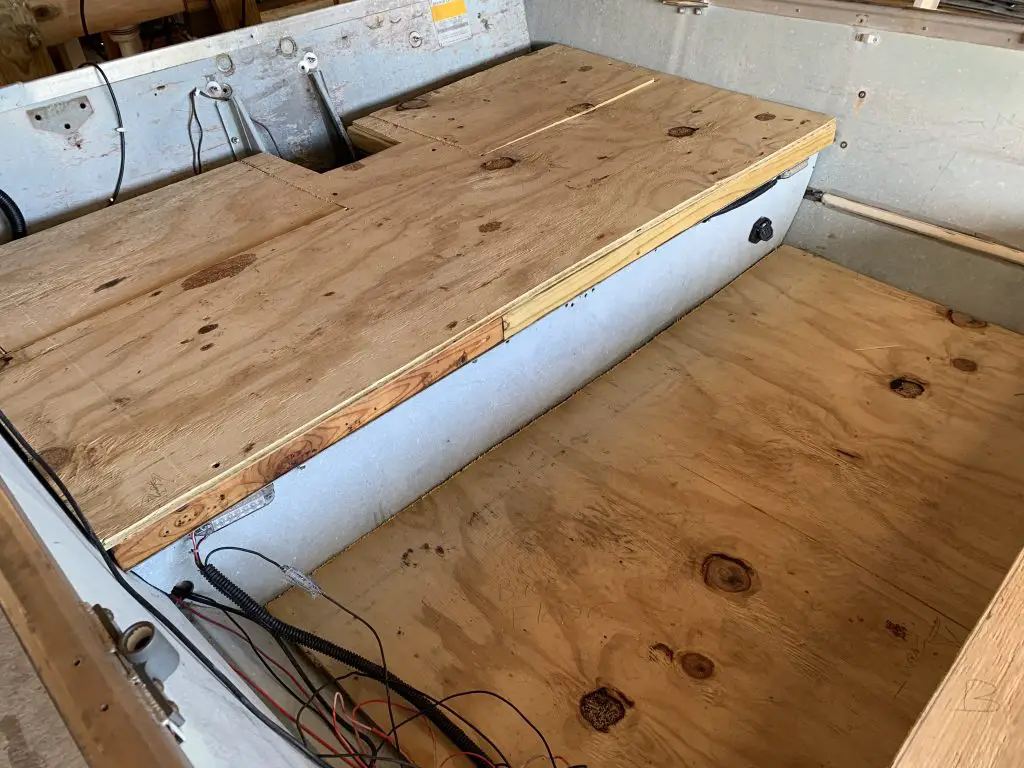
4. Assembling the Seat Box
Most seat boxes have several compartments for storage. Accessibility of fishing items is essential to a successful fishing trip. Again, this is determined by the type of seat boat box you want to build.
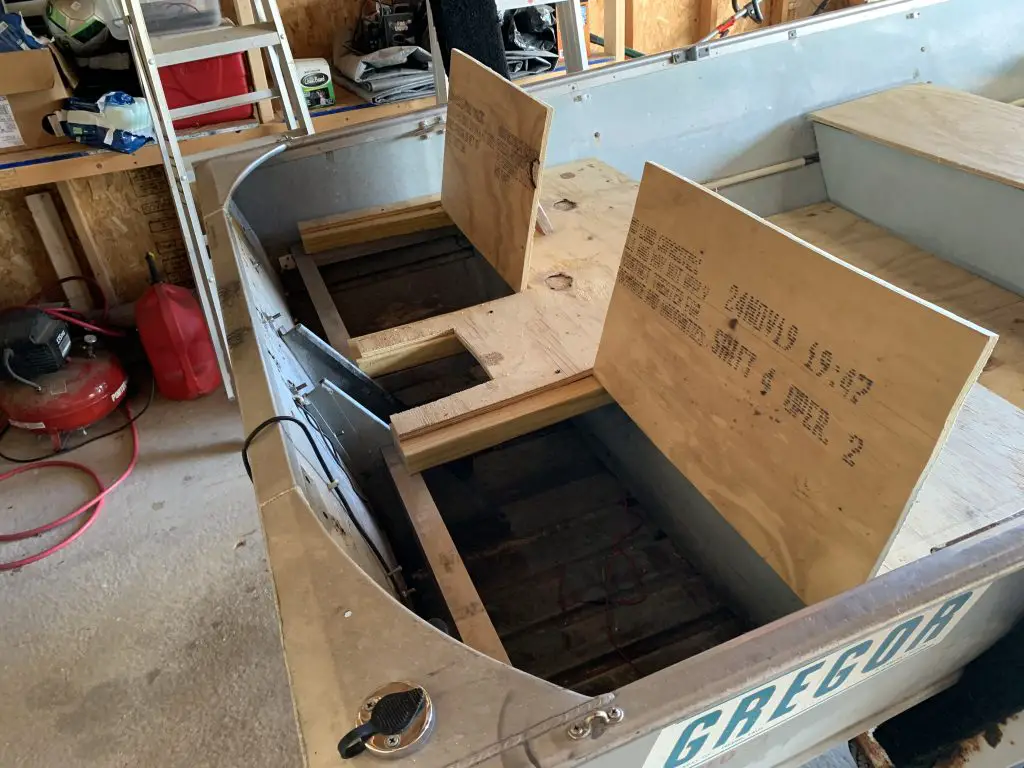
A few features of a seat box are necessary to keep in mind when building one. A hinged lid box with a lock and key could protect valuable items, so maybe you want to include one in your design.
Drill fasteners of your seat to the base box. You can also use swivels, brackets, or seat mounts. Certify that your chair is securely fastened.
5. The Finishing Touches
There was a lot to consider when designing and building your boat seat box. There is an array of natural and synthetic materials, fasteners, glues, and basic boat construct.
The overall process is simple once you’ve set your mind to a plan. As you finish up, is the boat seat box how you imagined in the beginning during preparation?
Conclusion
Building a boat seat box is simple. Firstly, you need to blueprint and measure your design. Then follow the steps after deciding the materials. Any hardware store or Home Depot will help you select the fabric and cut the correct portions.
A box is something every woodworker should know how to do. If this is your first time, I hope that this template helped. Fasten the seat using brackets or swivel, or seat mount.
Project “New Spot To Sit” Boating
Check out are article on: How To Build A Casting Deck In An Aluminum Boat? (7 Steps)